
Boucher Pastries
Small and very tasty boucher pastries are one of my favorite childhood desserts. I remember they were a rarity in the school canteen, but in cafes they were a common treat. They came in different sizes, with a chocolate top or sugar fondant, tall and almost flat, with buttercream, marmalade and even apple jam, and they were always delicious and cool!
At home, people usually used boiled condensed milk mixed with butter. Another good option is mascarpone cream cheese with powdered sugar. Combined fillings work well too: cream and thick cherry jam right in the middle of the pastry.
The idea of these desserts is to bake two small round sponges and form a thick layer of cream between them. Then the top sponge is covered with chocolate, and once it sets, the dessert is ready. Baking, making the cream and the chocolate take a little over half an hour, even counting the time for the sponge to cool. These pastries are easy to make because you almost certainly have all the ingredients at home. All that’s left is to boil a can of condensed milk, which you can do ahead and keep in the refrigerator, where it stays good for a very long time.


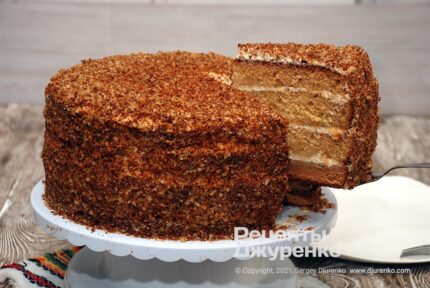


Ingredients
6-8 pcs (5 cm in diameter)
- For the sponges
- Eggs 2
- Sugar 2 tbsp
(27 g) - Flour 2 tbsp
(20 g) - Vanilla, salt to taste
- For the cream
- Butter 100 g
- Boiled condensed milk 0.5 can
- For the glaze
- Chocolate (70-75%) 60 g
Step-by-step recipe
To make boucher pastries quickly and properly you will need a mixer, which is handy for whisking the eggs and mixing the cream. Everything (baking, making the cream and the glaze) can be done in parallel. The sponges bake for 12-15 mins and cool almost right away, as they are small and thin. By the way, don’t use the highest speed when preparing the batter and the cream, as the mixture may separate.
Baking the sponge cookies for the bouchers
For a softer, more even sponge, the egg yolks and whites are whipped separately and then combined. Separate the whites from the yolks. Put the yolks in the mixer bowl, add 1 tbsp of sugar (14 g) and a little liquid vanilla. Whip the yolks with the sugar until they begin to lighten and grow in volume. You can transfer the mixture to a bowl for making the batter.

Put the egg whites in a clean mixer bowl and set it on ice or in very cold water. Add a small pinch of salt to the whites. Whip the whites with the mixer until they begin to grow in volume, then add 1 tbsp of sugar (14 g). Keep whipping until you get a dense mass several times the original volume. By the way, if the whites are whipped properly, you can turn the mixer bowl upside down and the mass will stay in place.

It’s best to do everything from here on with a spatula, silicone or wooden. And most importantly, don’t rush! With the spatula, transfer the whites into the bowl with the whipped yolks. Fold the two together gently. The mass will settle, which is normal. The sponges for boucher pastries should not be fluffy. The batter doesn’t even contain any leavening.

Sift the flour; you need only a little. Add the flour to the egg mixture. Mix the batter with the spatula until completely smooth. At first glance there isn’t much batter, but it’s enough to bake 12-16 round sponges about 5 cm in diameter. The small size lets you make a dessert you don’t have to bite or cut: just put it in your mouth and eat it.

A piping bag is handy for shaping the round cookies. For baking, my daughter and I use a silicone mold with cavities of the right size, greased with a little vegetable oil. But in general you can line a baking sheet with baking paper, grease it, and shape the rounds by eye. They may not turn out as neat, but they’re perfectly fine for pastries.

Shape the required number of rounds from the liquid sponge batter. By the way, there should be an even number, two per pastry. Smooth the batter slightly with a small spoon so it doesn’t stick up and the surface is as even as possible. Though this isn’t that important, since the glaze will hide any flaws. Put the cookies in an oven preheated to 180°C.

The sponges for boucher pastries bake for 12-15 mins. They brown quickly and barely rise. Keep an eye on the doneness: prick the thickest cookie with a toothpick, and if no batter is left on the wood, the sponge is done. Transfer the baked cookies to a flat board or plate to cool. This is quick, since they are thin, and after 10 minutes they are ready to be spread with cream.


Preparing the cream for the pastries
Bouchers are usually made with a simple buttercream, as in store-bought choux pastries and eclairs. Boil a can of condensed milk in advance; it turns light brown. The butter must be soft, so take it out of the refrigerator ahead of time. Mix 100-120 g of butter with the condensed milk, half a can or a little less. Mix the cream with a mixer. If it separates a little, chill it and mix again. There is usually some cream left over, and you can spread it on white bread and eat it.

Don’t let the cream get warm, it doesn’t like that, as the butter “melts” quickly. Use only real butter, because there is no telling how a plant-based product will mix with condensed milk. By the way, if you like, mix Italian mascarpone cream cheese with powdered sugar, which makes an excellent cream for bouchers.

How to assemble the boucher pastries
The cream is ready and the sponge has cooled, so it’s time to assemble the pastries. Divide all the prepared sponges into two groups. Keep the ones with a nice, even, domed surface for the tops of the pastries. They can be glazed right away. Melt ready-made chocolate with about 70% cocoa or a little more in a bowl over a water bath. Don’t use the darkest chocolate. You can also melt it in a saucepan over the lowest heat, but carefully.

Cover each sponge cookie set aside for the tops with melted chocolate. Do this quickly, because chocolate sets very fast. Keep the bowl or saucepan warm the whole time. Put the glazed sponges in a cold place.

Transfer all the cream to a piping bag. Use a piping tip with a large opening: the cream is quite dense and takes effort to squeeze out. Pipe a portion of cream onto each cookie set aside for the bottom, 2-3 cm thick, don’t be stingy! Spread the cream right to the edge of the cookie. If you can, make a pattern on the side of the cream, and the bouchers will look beautiful.

If the chocolate glaze on the top sponges has already set, gently place one chocolate cookie on each cream layer and press down very lightly, trying not to touch the chocolate: hold the cookie by the very edges. The buttercream is still soft and yields easily to pressure. Put the finished pastries on a flat-bottomed plate and place in the refrigerator.


How to serve boucher pastries
The cream needs some time to set. Let the pastries stand in the refrigerator for an hour or two. As soon as the buttercream is almost firm, the dessert can be served with coffee or cappuccino, if you manage to. Usually such pastries disappear instantly, given their small size and number. Still, if you have the time and desire, you can make even a hundred.

These are generally considered small treats, but nothing stops you from making them twice as big. Sugar fondant can be used for the glaze. On special occasions the cream is often piped as a ridge around the edge of the cookie, with 0.5 tsp of cherry jam (3 g) in the center, an amazing combination of flavors. And, as I said, a cream cheese cream also works very well and needs no extra chilling.

Calories and macros
404 kcal
100 g
- Protein7.1 g7% of kcal
- Fat26.8 g60% of kcal
- Carbs33.5 g33% of kcal
Calculated from the recipe ingredients, excluding salt and spices. Data: USDA and Matvaretabellen.
 Silicone dough mat with markingsAliExpress
 Dough scraper with scaleAliExpress
 Kitchen scale up to 5 kgAliExpress
 Pull chopper for garlic and onionAliExpress
 Oil sprayerAliExpress
 Vegetable chopper with handleAliExpress