
Homemade Pita in a Frying Pan
Pita, a round, flat, unleavened bread, is very popular along the shores of the Mediterranean. It is probably the oldest and best-known kind of baked bread. Its base is plain flour, often fairly coarsely ground. The dough is rolled out or pressed by hand to the thickness you need, then baked in a hearth, on a metal sheet, or stuck to a heated flat stone. Nothing complicated, really.
I read somewhere that the forerunner of modern pizza may have been the bread Romans baked on military campaigns. It was an unleavened dough shaped into a flat round and baked in a round shield. Plain unleavened bread is still baked in the Middle East, in Mediterranean countries, in the Caucasus, and all over the world. The techniques are much alike, though the names differ.
Many of you have surely tried, and even love, Eastern snacks wrapped in lavash. It is a popular way of serving food, and not only street food. A large, thin lavash is hard to make in a home kitchen, because you need the space. But making small flatbreads from unleavened dough, the size of your frying pan, is easy. They come out round and large enough to wrap a filling of fried chicken, salad and sauce.
It’s best to bake Arabic pita. Its special feature is that the bread separates into layers across its area as the dough produces steam. The steam forms a bubble that slightly separates the top of the dough from the bottom. This way you can learn to form a pocket for the filling. Though that isn’t essential. What matters far more is that the finished bread is soft, not like dry cardboard.
The most important thing is that your pita is soft and airy, and not like a piece of newspaper. For that we make the dough with hot water, almost a choux-style dough. It lets you bake a flatbread of perfect quality.
Unleavened dough is very simple. It is flour and water, sometimes with added salt, spices, oil or leavening. Unlike yeast dough, it doesn’t need to rise. To improve the structure of the dough and make sure there are no lumps, sift the flour. The smooth dough is rolled out by hand or with a rolling pin and made into various breads. The pita we make is close to the Arab and Greek versions. If you like, you can also use it for Italian piadina, whose flatbread is made with leavening.


Ingredients
8 pitas
- Wheat flour 2 cups
(260 g) - Hot water (about 90 °C) about 330 ml (250 ml per 1½ cups of flour)
- Salt to taste
Step-by-step recipe
So, as I said, to keep the pita soft and keep it from crumbling, we’ll make a “scalded” unleavened dough. Sift 1.5 cups of wheat flour (195 g) into a large bowl. Keep some flour aside for rolling out the dough. You can use ordinary soft, finely ground flour or whole-grain flour, as you like. Add 0.5 tsp of fine salt (3 g). Stir with a fork to distribute the ingredients.

It may seem unusual to knead the dough with hot water. It keeps the flatbreads from turning hard, and they will bend beautifully. The water must be hot, practically boiling, 90 degrees or a little more. For 1.5 cups of dry flour (195 g) I add 250 ml of hot water. I knead the dough right away with a fork.

I add flour in small portions until the dough is thick enough to barely stick to the sides of the bowl. After that the dough no longer burns your hands and you can knead it by hand. Adding flour in small portions, bring the warm dough to a soft, elastic state. Roll the dough into a ball and let it rest for 10-15 mins. Cover it with a napkin or an upturned bowl.

Divide the ball of dough into 8 pieces. Dust the table with flour and roll each piece into a circle with a rolling pin. The size should match the bottom of your frying pan. You need a pan with a flat bottom. I use a crepe pan, the one we fry thin pancakes in. It is large enough. If it’s hard to judge the diameter, cut a “template” from a sheet of paper. By the way, pita doesn’t have to be round; it can be square or triangular. And you don’t need to make a perfect circle with even edges either.

Heat the pan to the maximum temperature. No oil is needed, just a dry pan. Brush the leftover flour off the rolled circle of dough, because it would stay on the hot surface and burn. Put the pita round on the bottom of the pan. Fry for 1 minute at most, preferably even less. As soon as light brown spots appear, flip it right away.

Steam forms inside the layer of dough, so bubbles will appear. That’s normal. Fry the second side until spots appear. Immediately move the finished pita to a plate. Never leave the dough in the pan too long, or the pita will dry out and turn into a chip. Be sure to brush off any flour left in the pan from the previous round, and only then fry the next one.

Stack the finished pitas on a plate and cover with a napkin. They cool quickly. They are tastiest while warm. But if you like, they keep in the fridge for a day or two, provided you reheat them with the filling. Still, I advise making them for one meal and using them right away.

Each pita bends easily without tearing and rolls into a tube. Make a light sauce from soured milk with dill, cucumbers and garlic, and spread it over the bread. Lay on fried chicken, sliced vegetables and herbs. Make a snack for lunch. You can use anything you like as a filling.


Calories and macros
182 kcal
100 g
- Protein5.2 g12% of kcal
- Fat0.5 g3% of kcal
- Carbs36.9 g85% of kcal
Calculated from the recipe ingredients, excluding salt and spices. Data: USDA and Matvaretabellen.
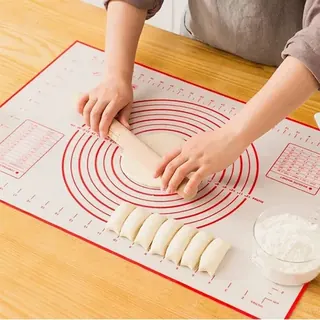 Silicone dough mat with markingsAliExpress
 Dough scraper with scaleAliExpress
 Kitchen scale up to 5 kgAliExpress
 Pull chopper for garlic and onionAliExpress
 Oil sprayerAliExpress
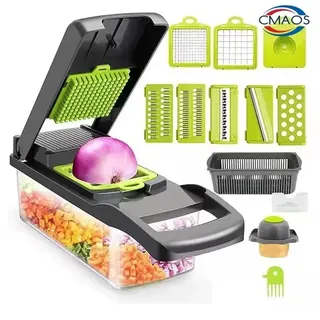 Vegetable chopper with handleAliExpress